Before You Start: Planning Your Asphalt Project
Alright, so you're looking at your driveway, maybe it's cracked, faded, or just plain old, and you're thinking, 'time for some asphalt.' Good call. A well-maintained asphalt driveway adds a ton of curb appeal and functionality to your home. But before you jump in, there's some planning you gotta do.
First off, what's the actual condition of your current driveway? Is it just surface cracks? Or are we talking about potholes, significant sinking, or even tree roots pushing things up? This makes a huge difference in what kind of project you're looking at. If it's minor surface stuff, you might be able to tackle some of it yourself. But if it's structural – uneven spots, big cracks, drainage issues – you're probably looking at a full replacement or a significant overlay, and that's definitely a job for pros like us at Paradise Asphalt Solutions.
Think about drainage too. Here in Shoreline, especially with our wet winters, proper water runoff is critical. You don't want water pooling on your new driveway, freezing, and causing damage. We always check the grading to make sure water flows away from your house and foundation, not towards it. This isn't just about the asphalt itself; it's about protecting your whole property.
Get a few quotes. Don't just go with the first guy. A good contractor will come out, inspect your site, explain what needs to be done, and give you a clear, written estimate. They should also be able to tell you about their process, materials, and timeline. Ask for references, too. You wouldn't buy a car without checking reviews, right? Same goes for something as important as your driveway.
During the Project: What to Expect and When to Step Back
Once you've picked your contractor and the project kicks off, here's what you should see happening. For a full replacement, they'll start with excavation. That means digging up the old stuff, and sometimes quite a bit of soil, especially if the base isn't solid. We've seen homes in areas like the Highlands where the soil is pretty silty, so getting a good, stable base is absolutely essential. This isn't a DIY job; you need heavy equipment and expertise to get the sub-base right.
Next comes the aggregate base layer. This is usually crushed rock, and it's compacted super tight. This base is the backbone of your driveway; if it's not done right, your asphalt won't last. Then, the asphalt layers get laid down. Typically, it's a binder course first, then a surface course. Each layer is rolled and compacted while it's hot. You'll see steam, you'll smell asphalt – it's all part of the process.
What can you do during this? Mostly, stay out of the way! Let the professionals do their thing. Make sure pets and kids are clear of the work area. You can ask questions, of course, but try not to interrupt the crew while they're actively working. They're focused on getting it perfect.
If you're doing a smaller repair yourself, like filling minor cracks, make sure the area is clean and dry. Use a good quality crack filler, and follow the instructions on the package. Don't try to patch large potholes with a tube of filler; that's just a temporary band-aid and won't hold up.
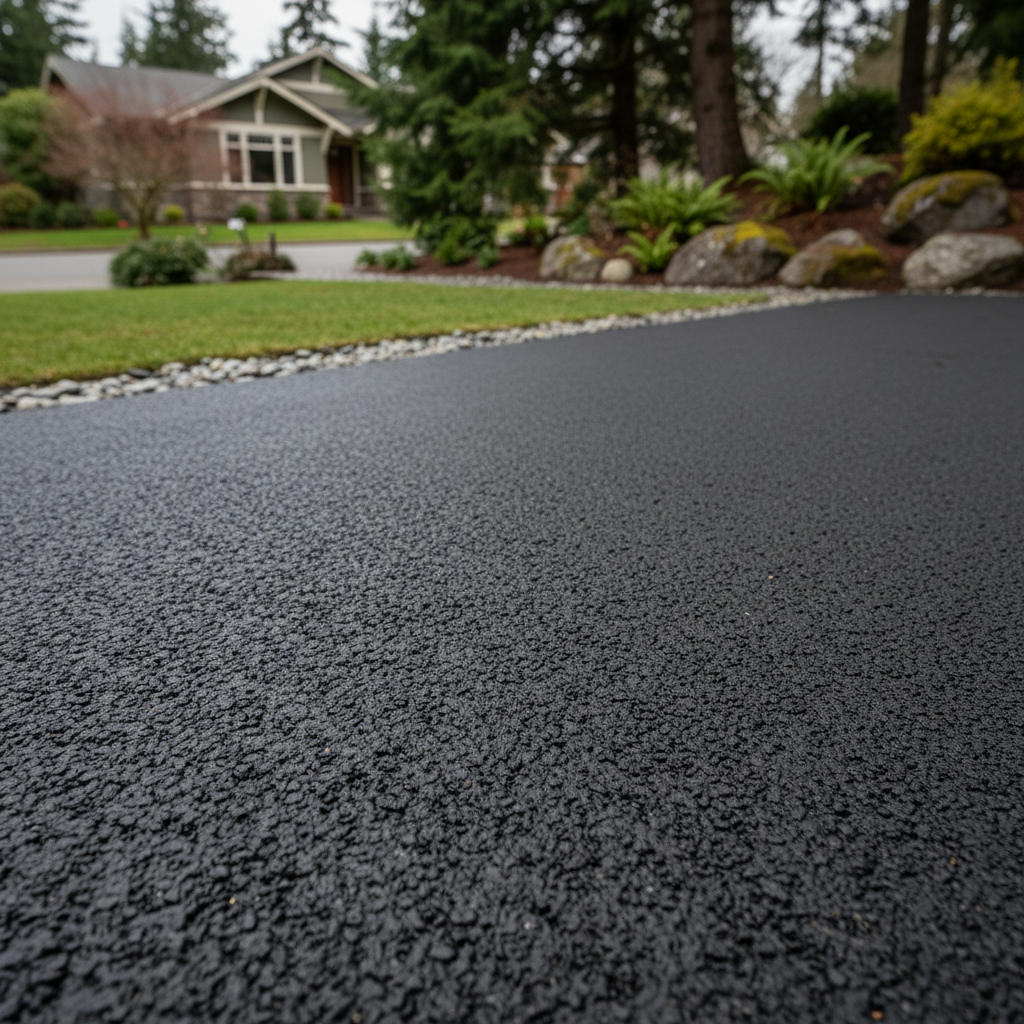
After the Project: Care and Maintenance for Longevity
Alright, the new asphalt is down, it looks great, and you're ready to show it off. But hold your horses! You can't drive on it right away. Your contractor will give you specific instructions, but generally, you'll need to wait at least 24-48 hours before driving on it, and sometimes longer for heavier vehicles. It needs time to cure and harden properly.
For the first few months, your new asphalt is still a bit 'soft.' Avoid parking heavy vehicles in the same spot for extended periods, and try not to turn your steering wheel sharply while stationary – that can scuff the surface. Don't let oil or gas spills sit on it; clean them up quickly, as they can break down the asphalt.
Regular maintenance is key to making your driveway last. Here's what you should be doing:
- Keep it clean: Sweep off dirt, leaves, and debris. This prevents organic matter from breaking down and causing issues.
- Sealcoating: This is huge. I recommend sealcoating your driveway about a year after it's installed, and then every 2-3 years after that. Sealcoating protects the asphalt from UV rays, water penetration, and chemicals. It's like sunscreen for your driveway, and it keeps it looking sharp. This is definitely a job you can do yourself if you're handy and have the right equipment, but for the best results and longevity, many homeowners choose to have a professional like Paradise Asphalt Solutions handle it. We've got the commercial-grade sealants and application techniques that make a real difference.
- Crack Repair: If you see small cracks developing, address them quickly. Fill them with an asphalt crack filler. This stops water from getting underneath and freezing, which is what causes bigger problems like potholes.
- Edge Care: Keep the edges of your driveway clear of vegetation. Roots can undermine the asphalt, and grass growing into the edges can cause them to crumble.
Taking care of your asphalt driveway isn't rocket science, but it does require a little attention. Do these things, and your investment will pay off for years to come. If you're ever unsure, or if you're facing repairs that look bigger than a DIY weekend project, don't hesitate to give us a call. We're always happy to help our Shoreline neighbors keep their driveways in top shape.